
If you have not checked out the previous posts in this series please feel check them out before continuing here.
Overview
In this post will be covering setting up there right joystick input. Rotating the player in the direction of the joysticks input. Lastly, firing a projectile in that direction.
Inputs
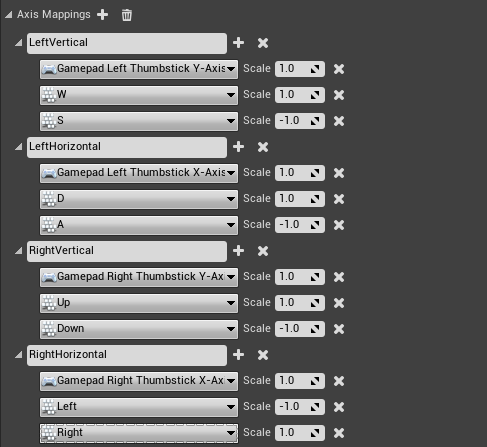
Just like the previous set up we need to add two axis mappings to our input settings.One for the RightVertical and one for the RightHorizontal. Remember that the Input settings our under the Edit -> Project Settings. Copy the settings from the image below.
Player Rotation
We will need to modify our MyPlayer blueprint. Open it up and select the Viewport tab so we can see the changes we are about to make. First off we need to adjust the CameraBoom otherwise when we rotate the player it will get rotated as well. Select the CameraBoom in the Components panel. Then in the Details panel scroll down to the Camera Settings group and uncheck Inherit Pitch, Inherit Yaw, and Inherit Roll.

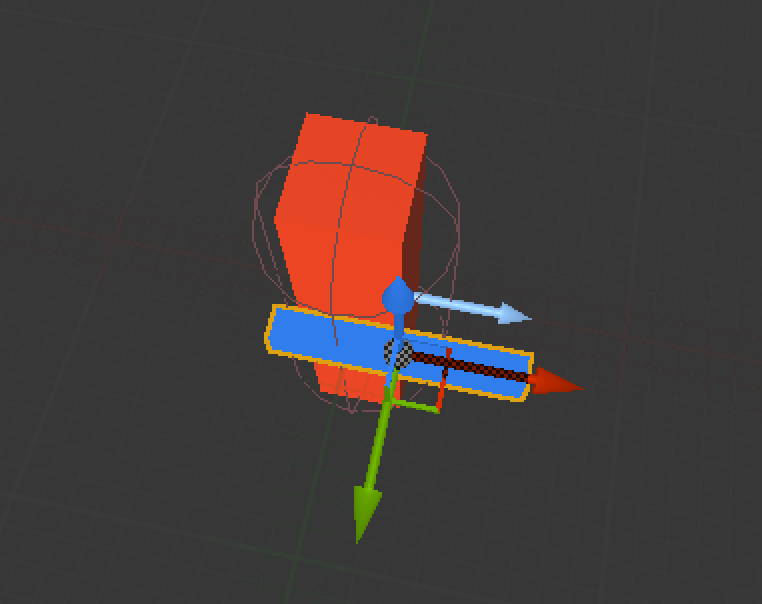
Since we are dealing with direction it would be helpful to know which direction is our player is facing. In the Components panel click + Add Component dropdown and select Static Mesh. Rename the component to Gun. Also, position and scale it to be similar to a gun.
Add a Scene Component and name it GunTip. Drag and drop this on the Gun component to make the Gun the parent of GunTip. Then position the GunTip to be at the tip of the Gun.

Be sure to compile and save. It appears that somethings aren’t exposed until you compile. Since we are now going to the Event Graph I want all the changes to the components to be available in the blueprint. Select Event Graph tab. We are going to add some local variables to store information as we are processing through our visual code. In My Blueprint panel under the Variables click the + to add your new variable. Name it Target Forward. In the Details panel and change the Variable Type to Vector.

Here is a list of the the other variables we need and their types. I will also include their default value if it has something other than default. You may need to compile to set the default value.
- Current Rotation (Rotator) view
- Target Rotation (Rotator) view
- Rotation Multiplier (Float): 10.0 view
The variable list should look something like the image below.

We are going to use the input events for the right joystick to handle rotation. We get a X and Y value from the two axises. So we need to store that value.
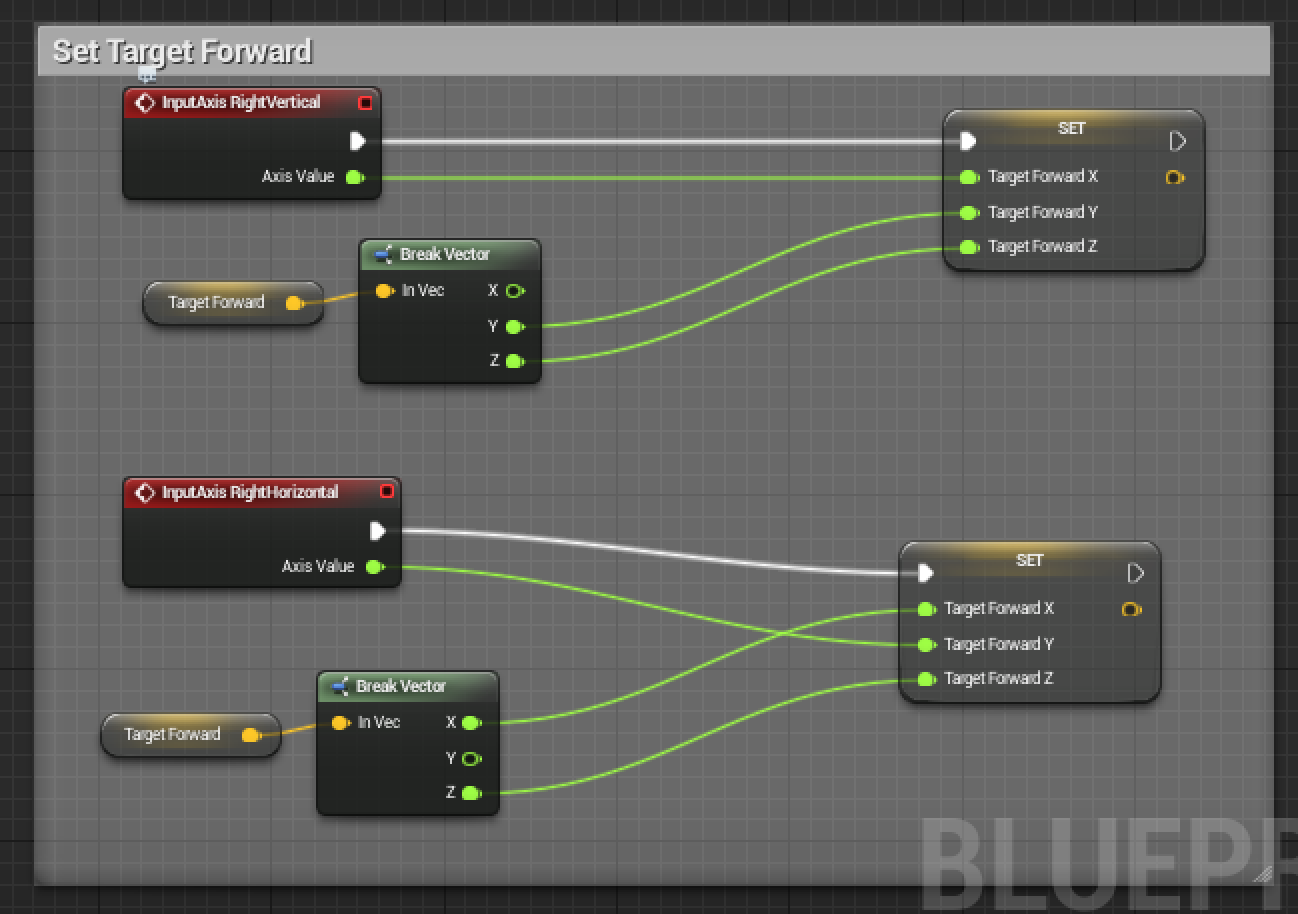 So here we are taking breaking the Target Forward variable into it’s axises so we can just set the value that has change when we receive the input event.
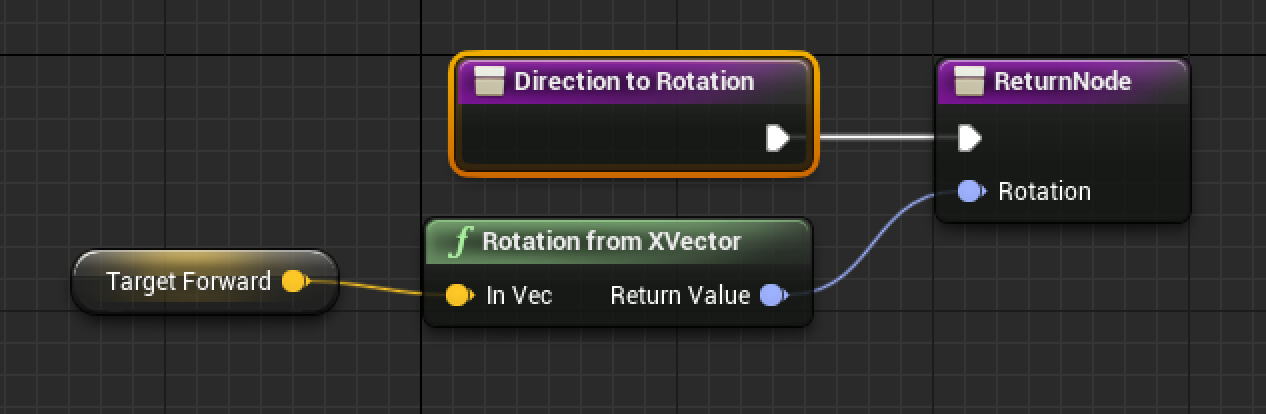
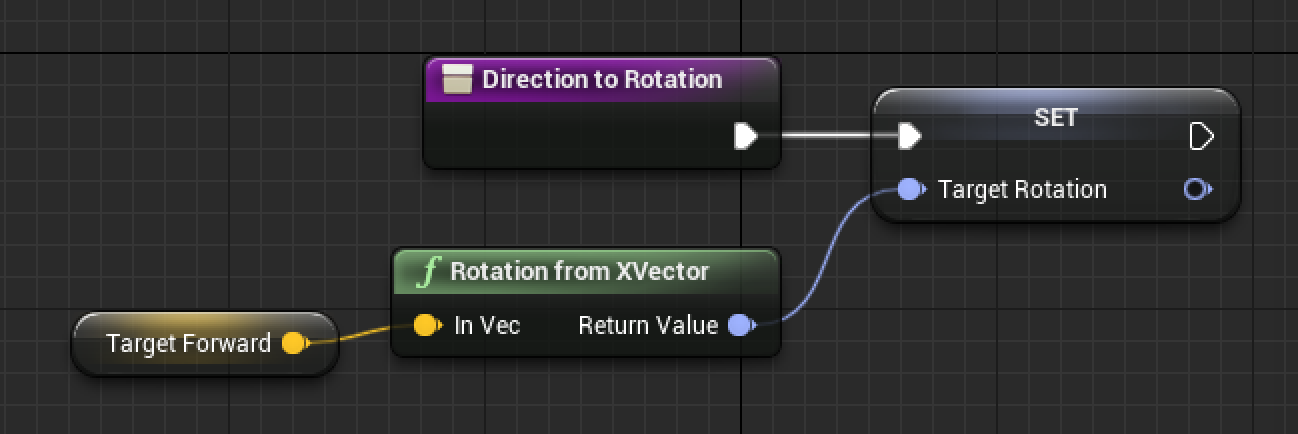
We need to convert that into a rotation so we can apply it to the player. Let’s create a function to do this. In the My Blueprints panel click the + next to the Functions. Name it Direction to Rotation. That should have opened the function blueprint. This works pretty much exactly like the Event Graph. In the Detail panel at the bottom there are Inputs and Outputs. Our function doesn’t need any Inputs but we do want to add a Rotator. Click New in the Outputs group. Name it Rotation and set it’s variable type to Rotator. Now this method will take our forward and convert it to a rotation. Then we return that value. So your method should look something like below.
Go back to the Event Graph and add the following nodes.
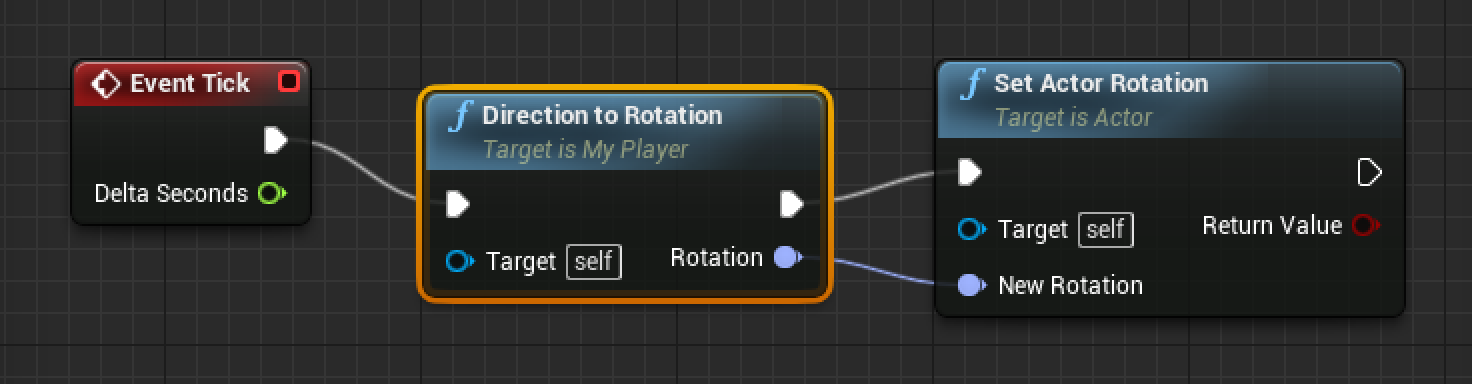 Compile and Save and the hit Play. If you use the arrow keys you should now be able to have the player point in the direction of the arrows pressed.
Smoothing It Out
I thinks thinks are a little too quick. I don’t want my character to snap to a direction I want him to smoothly travel to that direction. So we are going to make this a little bit more elaborate. Return to the Direction to Rotation function. Modify it to not return the value but to store it in as Target Rotation. Then remove the output node.
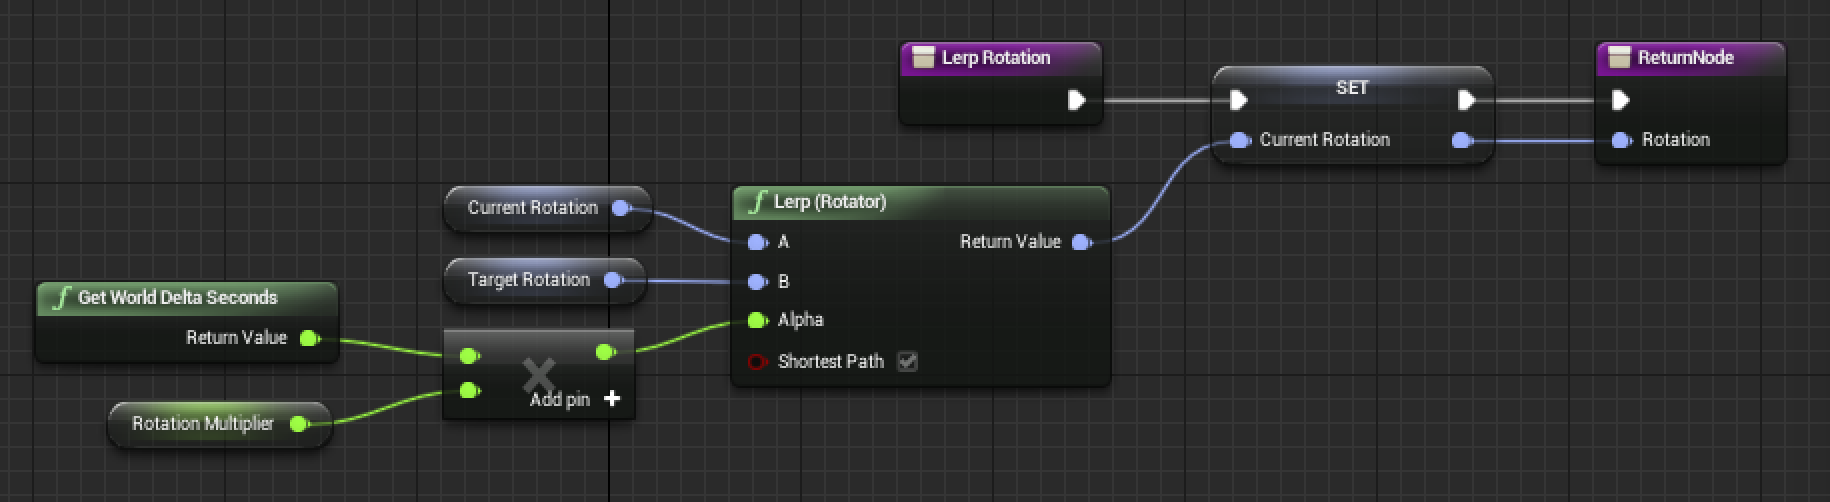
Create a new function called Lerp Rotation. This function will store our current rotation and rotate it towards target rotation using delta time.
 Modify the Event Graph to include the new function.

Compile and Save. Then test and see what our changes accomplished. You should see a much smoother turn on the player but it seems that when you release the arrow keys he moves back to his starting rotation. That is not what we want but so we will need to check if the joystick has acceptable values and only then update the Target Rotation.
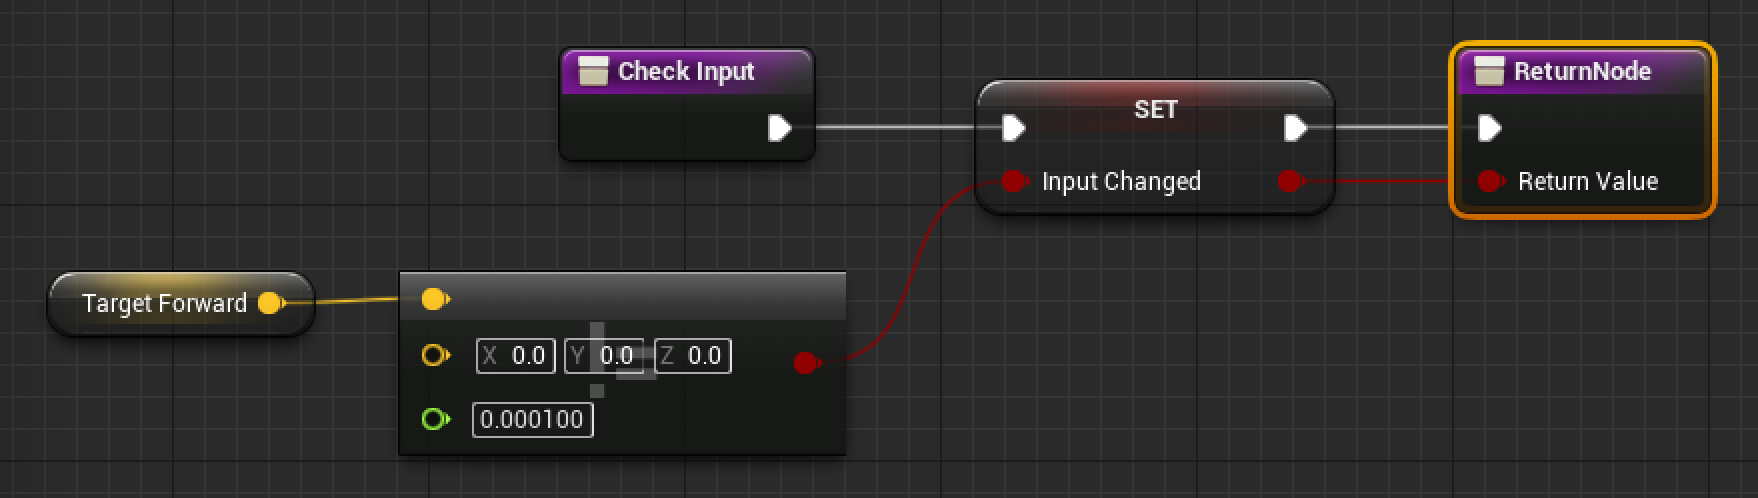
Create a new Boolean variable and name is Input Changed. Then add a new function called Check Input and match the picture below.
Modify the Event Graph to include the new method and now update the Target Rotation if Check Input is true.

Compile and Save. Test your game and verify that the character does keep his current rotation when you are not holding any input.
Firing
First we need to create a particle to fire. So lets go back to our Content Browser and Add New. Select Blueprint Class. We are going to use Actor blueprint parent. Name is MyProjectile.
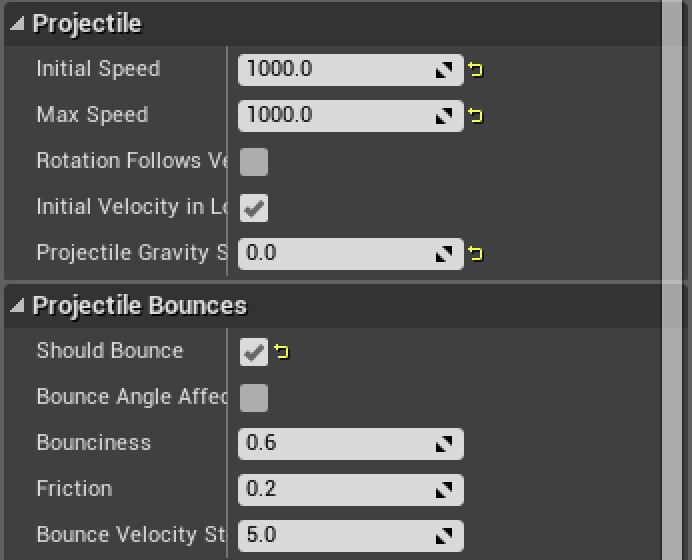
I am going to just use a sphere to present my projectile. Add the Sphere component in the Components. Also add the Projectile Movement. With the Projectile Movement selected change the following settings in the Details panel.
In the Event Graph we are going to add a lifetime so it will be destroyed. This accomplishes a couple of goals. First, it allows us to get them out of the level because we will kill the fps if we leave them on stage. Second, it allows us to limit the range we can shoot. Create a Life Span variable with a default value of 2.0. Update your Event Graph to look like the image.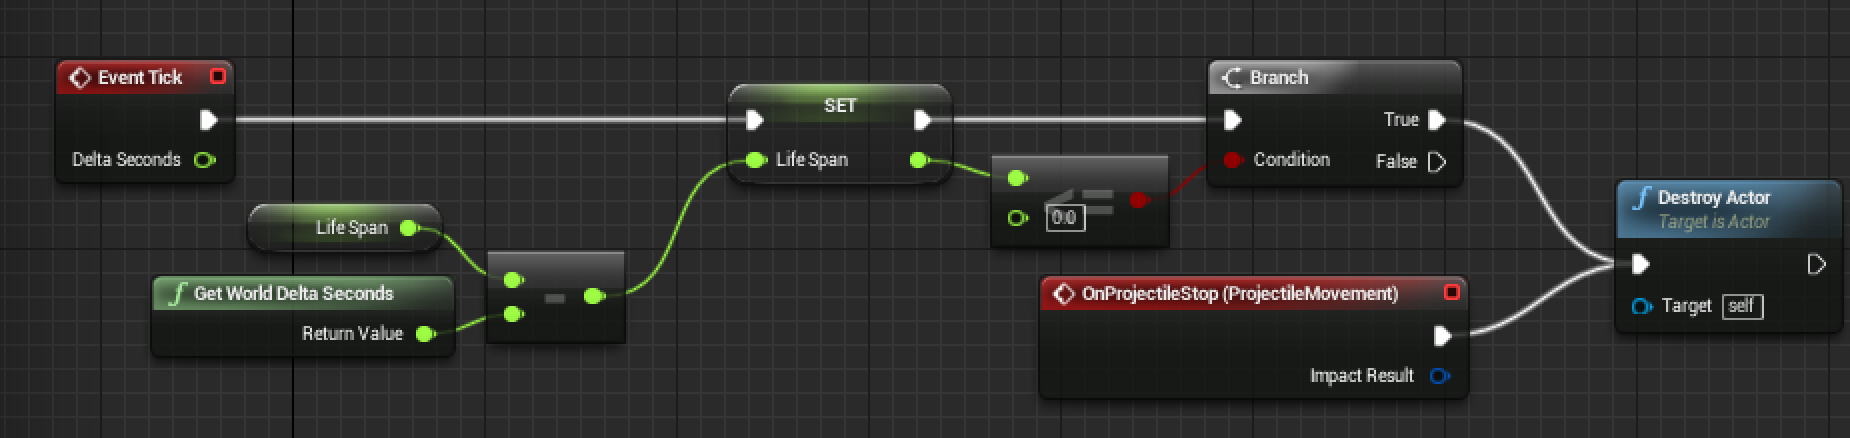
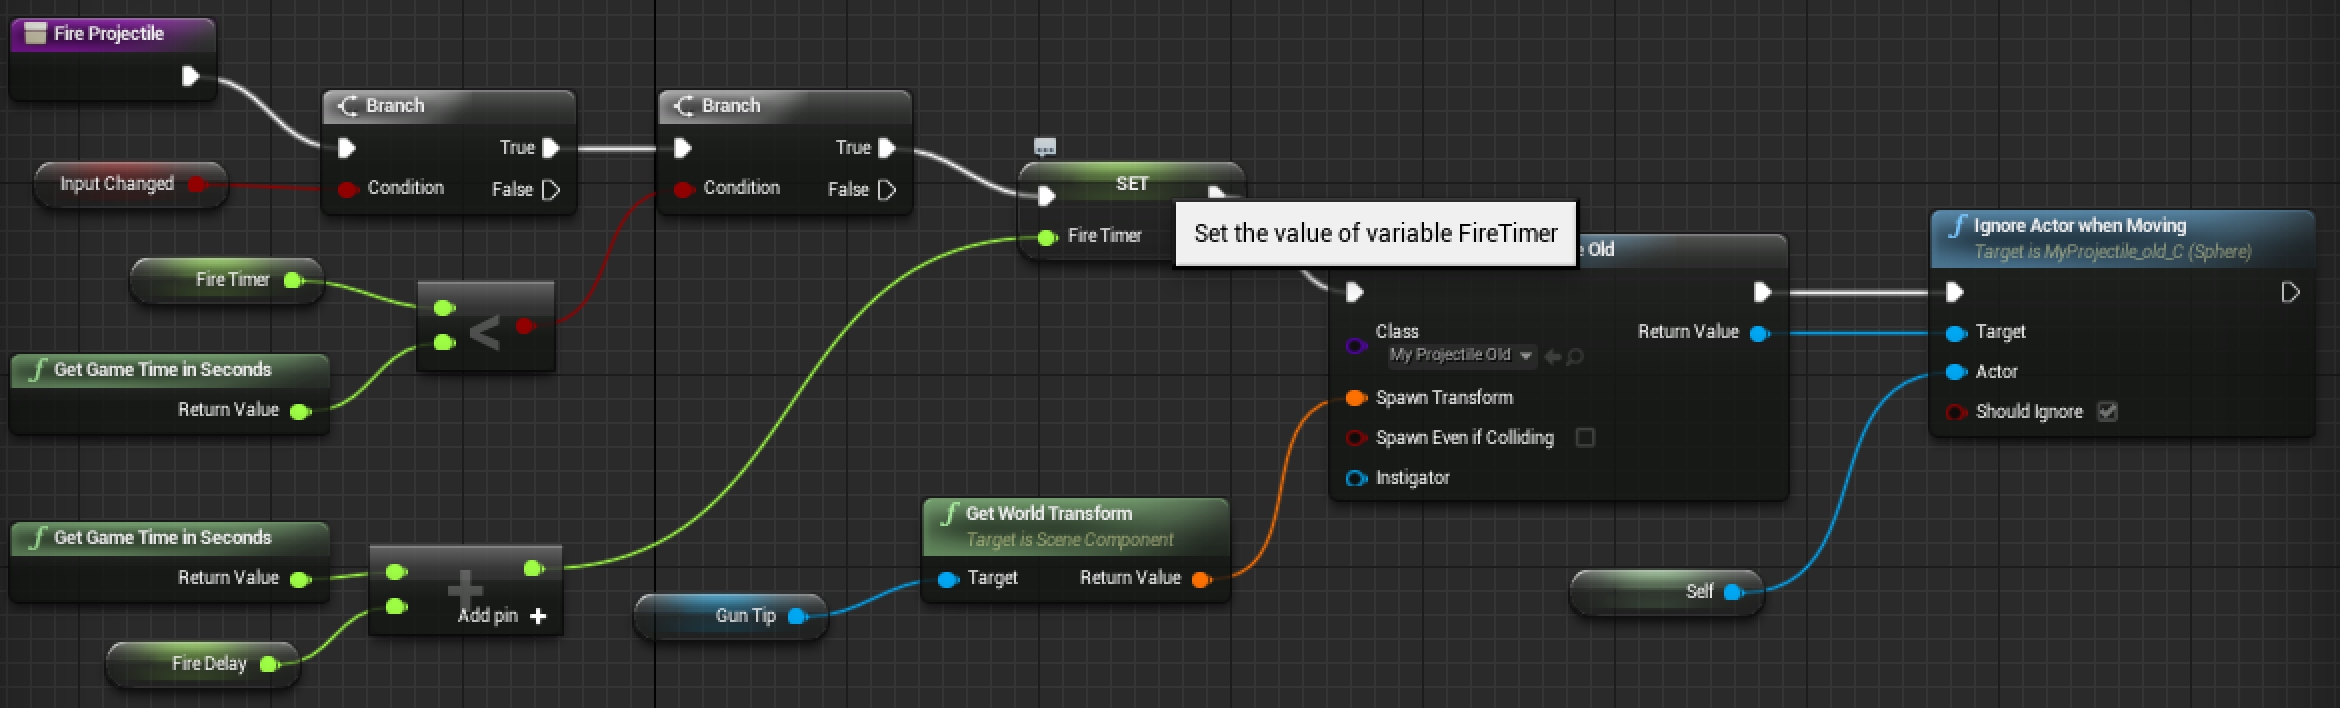
Next we will create a way to shoot this projectile. You can Compile and Save. Then return to the MyPlayer Event Graph and add the method Fire Projectile. I also added two float variables, FireTimer and FireDelay.
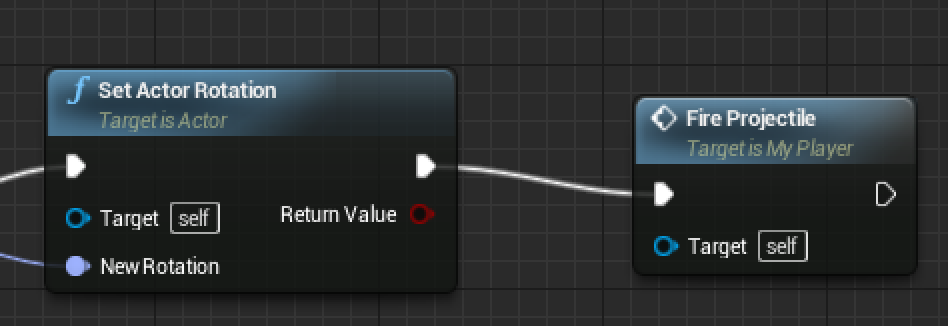
 Lastly, add the new function after the Set Actor Rotation.
 Conclusion
So that wrap it up we covered rotating the player towards the right joystick and move fire a projectile. You should be able to Compile and Save and then Test.
